Technology
6 min read
–
May 11, 2023
Deploy a Jenkins Cluster on AWS with Terraform and Packer
Learn how to build a Jenkins cluster on AWS with Terraform and Packer, and how to build a CI/CD pipeline for a Serverless app on top of it.
Last month, we hosted our 2nd “Wardens Assembly” event in our Discord community where we showcased how to deploy a Jenkins cluster on AWS with Terraform and Packer, and how to build a CI/CD pipeline for a Serverless app on top of it. In case you missed the event, you can watch it completely here:
In case you want to cut straight to the chase, this tutorial is for you as it covers only the key parts of building the Jenkins cluster, including:
- Baking machine images with Packer
- Discovering Jenkins as Code with Groovy
- Deploying Jenkins cluster on AWS with Terraform
Before jumping into the code, the diagram below summarizes the architecture we're going to build by the end of this tutorial:
.png)
Jenkins uses a master-worker architecture for managing distributed builds. Each component plays a specific role:
- Jenkins master: Handles scheduling of build jobs and distributes them to workers for execution. It also monitors worker states and collects and aggregates build results in the web dashboard.
- Jenkins worker: Also referred to as build agent, this Java executable runs on a remote machine, listens for requests from the Jenkins master, and carries out build jobs. You can have numerous workers (up to 100+ nodes), which can be added and removed on the fly. As a result, workloads are distributed automatically, and workers alleviate the load on the master Jenkins server.
We’re going to bake two Amazon Linux Images (AMIs) using Packer, one for worker machines and another for the Jenkins master. From there, we'll use Terraform to deploy Jenkins in a distributed mode on AWS based on those AMIs. Additionally, we'll set up scaling policies with CloudWatch to trigger the scaling of Jenkins workers according to their CPU utilization.
You can find all the source code used in this tutorial on GitHub.Building a Jenkins worker AMI
Our first machine image will be an Amazon EC2 AMI for the worker machines. To create this AMI, we need to write a Packer configuration file. Create a template.json with the following sections:
- variables: Instead of hardcoding values in the template file, we are using variables that can be overridden at the Packer runtime.
- builders: Because the target machine image is an Amazon Machine Image, we are using the amazon-ebs builder.
- provisioners: The stage is responsible for installing and configuring all needed dependencies.
%2520(1).png)
Substitute the value of source_ami with the appropriate Amazon Linux AMI ID. The ID can be found by heading to AWS EC2 Console. Click “Launch EC2 Instance”. On the “Choose AMI tab”, type “Amazon Linux AMI” in the search bar.
Packer fully supports multiple modern configuration management tools such as Ansible, Chef, and Puppet. Bash scripts are also supported. To simplify the baking process for the worker's AMI, we can use the following setup.sh bash script:
%2520(1).png)
The script will install Java JDK, Docker Community Edition, and Git client, which are the required dependencies for running CI/CD pipelines.
With the Packer template being ready it is time to build our first AMI. This is done by calling the packer build command with the template file as an argument. Packer will deploy an EC2 instance based on the configuration specified in the template file, and then execute the bash script on the deployed instance.
At the end of running the packer build command, Packer outputs the artifacts that were created as part of the build. Artifacts are the results of a build and typically represent the AMI ID.
Building a Jenkins master AMI
To automate a Jenkins master instance completely, we'll use Jenkins post-initialization scripts. We'll harness the power of Groovy scripts and put them in the $JENKINS_HOME/init.groovy.d directory. Jenkins will consume this directory upon startup, enabling us to preconfigure Jenkins to the desired state.
The basic-security.groovy script creates a Jenkins user with full admin access. Besides user management, we'll also establish basic configurations to harden Jenkins against Cross-Site Request Forgery (CSRF) attacks using csrf-protection.groovy. With CSRF protection enabled, all issued tokens must include a web session to prevent external attackers from acquiring web sessions.
Jenkins features a built-in CLI that lets users and administrators access Jenkins from a script or shell environment. However, using the CLI is discouraged for security reasons (to avoid remote access), so we'll disable it through the disable-cli.groovy script. We'll also disable the JNLP and old unencrypted protocols (JNLP-connect, JNLP2-connect, JNLP3-connect, and CLI-connect) using disable-jnlp.groovy to eliminate warning messages in the web dashboard.
%2520(1).png)
We still need to install plugins to extend Jenkins functionalities in order to be able to build CI/CD pipelines. Plugins can be easily installed from the Jenkins dashboard. However, the purpose of this tutorial is to build a fully automated Jenkins AMI, because if you want to install many plugins, this manual process can be fairly long and boring. Therefore, we will use a script provided by the Jenkins community to install plugins, including their dependencies. The scripts take, as a parameter, a file containing the list of Jenkins plugins to be installed.
Finally, we will update the Packer template file used to build the Jenkins worker AMI to upload theGroovy scripts described previously to the temporary instance by using the file provisioner. Next, we use a shell provisioner to move these files to the init.groovy.d folder. The template.json file should look similar to the following listing:
%2520(1).png)
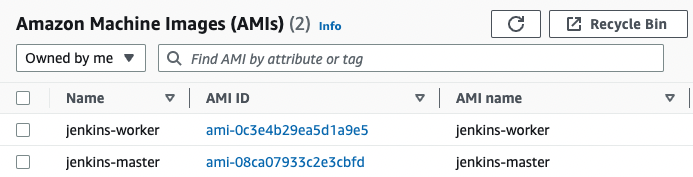
After files are uploaded to the temporary instance created by Packer, a setup.sh script will be executed to install the Jenkins LTS version. The script then installs the Git client. Following that, it copies the workers' private SSH key to the /var/lib/jenkins/.ssh folder and sets permissions. Lastly, it moves Groovy scripts to the initialization folder, installs essential plugins by running the install-plugins.sh script, and starts the Jenkins server. Now that the template is ready, we will bake the AMI with the packer build command. If the script succeeds, Packer should show a message containing the AMI ID, and the Jenkins master AMI will be available in the EC2 dashboard, as shown below:
Now that our Jenkins cluster AMIs are ready to use, we will use them in the next section to deploy our cluster on AWS with Terraform.
Deploying a Jenkins cluster with Terraform
Let’s start by creating an EC2 instance to host the Jenkins dashboard. Create a jenkins_master.tf and declare an aws_instance resource, which will use the Jenkins master AMI baked by Packer. Attach a security group to the instance to allow SSH and inbound traffic on port 8080 (Jenkins web dashboard).
The amount of memory Jenkins needs depends on your project build needs and the tools required by the same builds. Each build node connection will take two to three threads, which equals about 2 MB or more of memory. You will also need to factor in CPU overhead for Jenkins if a lot of users will be accessing the Jenkins user interface.
%2520(1).png)
Running a single Jenkins instance is a good start, but in the real world, a single instance is a single point of failure. If that instance crashes or becomes overwhelmed by too many builds, developers can no longer deliver their releases. The solution is to run a cluster of Jenkins workers and adjust the size of the cluster up or down based on resource utilization. Therefore, create an autoscaling group by declaring an aws_launch_configuration resource in jenkins_workers.tf:
%2520(1).png)
To auto-discover the Jenkins master by the worker machines, we’ll pass a user-data script that will be executed at boot time on each Jenkins worker instance. The script takes as a parameter the Jenkins admin credentials, Jenkins SSH credential ID, as well as the Jenkins private IP address.
The scripts/join-cluster.tftpl script will fetch the running instance’s private IP address from the EC2 metadata (available at 169.254.169.254/latest/meta-data). The script will then issue an HTTP request to Jenkins with a Groovy script to add the instance to the cluster.
%2520(1).png)
Now that the Jenkins workers’ blueprint is defined in a launch configuration, we can deploy an Auto Scaling Group (ASG) to deploy similar Jenkins workers based on the launch configuration. This ASG will run 2 to 10 workers (defaulting to 2 for the initial launch).
So far, the number of workers is static and fixed. To scale the number of workers dynamically, we will define scaling policies based on CPU utilization. This gives you extra capacity to handle the build of additional jobs without maintaining an excessive number of idle Jenkins workers and paying extra money.Create a cloudwatch.tf file and define an AWS CloudWatch metric alarm based on CPU utilization. The CloudWatch alarm will trigger a scale-out event to add a new Jenkins worker instance if the average CPU utilization is over 80% for a period of 2 minutes. Similarly, we define another CloudWatch alarm to trigger a scale-in event to remove a Jenkins worker if the average CPU utilization is less than 20% for a period of 2 minutes.
.png)
We can take this architecture further, and configure a public-facing load balancer in front of the Jenkins instance to access the Jenkins web dashboard. This way, your Jenkins instance does not have to be directly exposed to the internet. The load balancer will listen on both the HTTP (80) and HTTPS (443) ports and send incoming requests to the instance on port 8080. That way, it uses an encrypted connection to communicate with the Jenkins instance.
Finally, if you would like to use a friendly DNS name to access your load balancer, instead of the default DNS name automatically assigned to your load balancer, you can create a custom domain name and associate it with the DNS name for your load balancer. The DNS configuration can be done on Amazon Route 53.
With the Terraform stack complete, jump to your terminal and run terraform apply command to provision the Jenkins architecture in your AWS account.
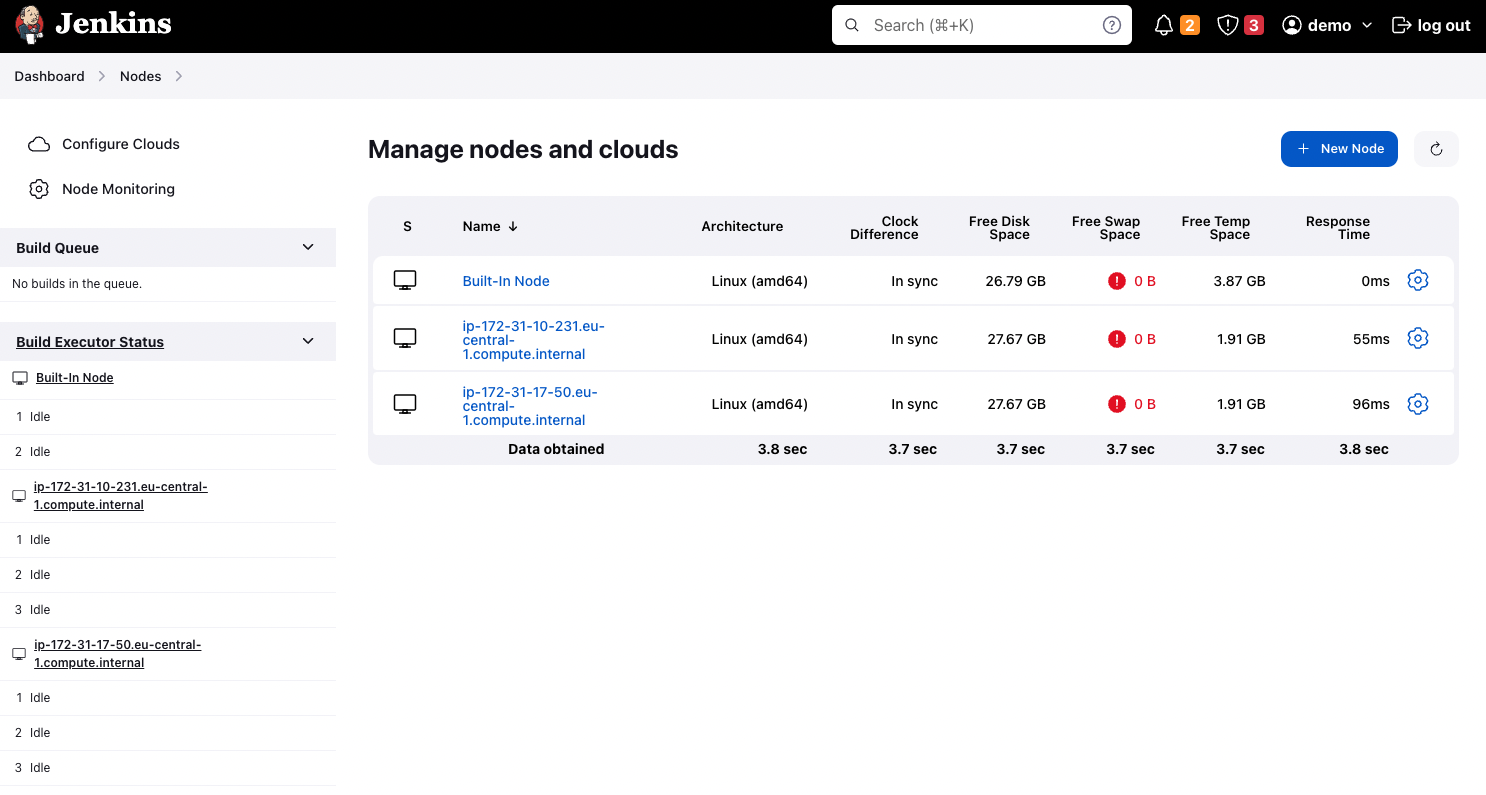
Once the stack is deployed, 3 EC2 instances should be provisioned as follows:
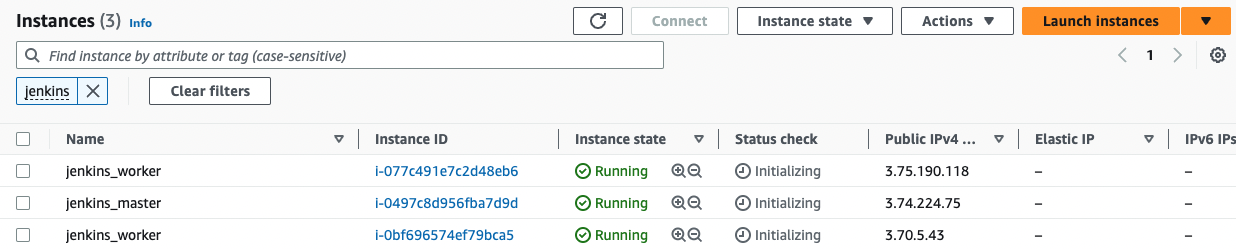
Point your browser to the Jenkins dashboard DNS name. This time, the setup wizard should disappear and many functionalities should be added. Sign in using the admin credentials defined in the basic-security.groovy. Your Jenkins cluster should be up and running with 2 workers.
Congrats! you learned how to deploy a highly available, secure, and resilient Jenkins cluster on AWS by using Terraform and how to use the baked Packer images to deploy workers to scale.
Regardless if you are a Developer, DevOps, or Cloud engineer. Dealing with the cloud can be tough at times, especially on your own. If you are using Tailwarden or Komiser and want to share your thoughts doubts and insights with other cloud practitioners feel free to join our Tailwarden discord server. Where you will find tips, community calls, and much more.

